INSTALLING the ALATOONA SIDING
Background
Alatoona is a scene I had as one of my original "druthers". There are two terrific pictures which indicate that it looks to be a major wood cutting facility. One photo, shown below, clearly shows piles of wood to the right which appear were cut for fuel. To the left along the tracks the piles or stacks appear to be cut as ties.

In this picture below, the flat cars appear to have loads of either ties or lumber. The shed in left foreground looks to be filled with fire wood. Side note: for the water tank conversations in our yahoo group site, this picture has what appears to be two water tanks, one round one rectangular. There is one opinion that the rectangular one was built by the USMRR. Not sure yet so more to research; however I am building these as well because the look is too cool to pass up.

The other hook for me to add this scene is the fact that it was on a siding. This was a must to include since there are so few photos of line-side industries. However, once I had the final layout design Alatoona was omitted; the layout area would have been too congested. Forward 10 years...
Recently the American Civil War Railroad Historical Society group met for its annual convention in Kennesaw GA. Alatoona was on the itinerary. Although I had been considering 'installing' Alatoona and was not committal, this visit was the capper. We walked along the former track route into this MAGNIFICENT cut! I believe about 80' high. There was, still is to a much less degree, a fort known as the Star Fort in the top photo at the top left, which now of course is full of trees. A few us took the hike and there are still remnants of the walls with a few historical placards describing the battle.
Alatoona by Ken Pruitt
When I began my research on the W&A, I met Colonel Bogle who was good friends with Wilbur Kurtz, Kurtz being the consultant to Gone With The Wind and Disney's Great Locomotive Chase. The good Colonel, who has since passed away, told me about this other fella doing the exact same research for the same reason, a model railroad, Ken Pruitt from Michigan. He had many conversations with Bogle who learned a great deal from Mr. Kurtz. I contacted Ken who had become a library of information on the W&A. This scene below was on Ken's W&A. He since needed the space for other domestic priorities...and that's how we have history. Ken has a passion for precision for replicating W&A elements. As you can see Ken was able to combine kit bashing along with scratch building to model an excellent model of Alatoona. In a recent conversation Ken mentioned the long shed was actually built for Sherman's army as a supply depot. The smaller shed housed a saw mill. As a modelling element I would need to omit the long shed given my version is prior to the "invasion" by the Union Army of the Tennessee. But it's too interesting not to include.

The Rectangular Structure
 One
mystery was, and still is, the rectangular structure adjacent to the
water tower. Ken told me that Col. Bogle said it was a sand holding structure to refill the loco sand domes. Supposedly a canvas was stretched the over top to keep it dry. A more recent discovery was this same container as seen in the drawing to the left by a Yank. It shows a spout on the right end, better viewed in a zoom. This structure is also seen in a photo of the Atlanta rail yards but partially hidden.. I guess an argument could be made it poured sand. My intention is to use it as a water tower.
One
mystery was, and still is, the rectangular structure adjacent to the
water tower. Ken told me that Col. Bogle said it was a sand holding structure to refill the loco sand domes. Supposedly a canvas was stretched the over top to keep it dry. A more recent discovery was this same container as seen in the drawing to the left by a Yank. It shows a spout on the right end, better viewed in a zoom. This structure is also seen in a photo of the Atlanta rail yards but partially hidden.. I guess an argument could be made it poured sand. My intention is to use it as a water tower.
Choosing Layout Location
Alatoona is actually located north of Big Shanty and south of Kingston. One of the beauties of building a layout is of course the option to alter geographics. My version of Alatoona is north of Kingston on this layout. It is the most open space on the layout. Although a nice uninhabited run on this single track main is removed, it was too interesting to pass up.
This photo below, by D.C. Cebula, shows the area where the siding is to be added. By the way, D.C.also built and carved this rock outcropping known as Rocky Face. The Confederates built a defensive stronghold here to protect the town of Dalton and the railroad, Army of TN's supply line.
There are several criteria that determined this to be the spot. The most obvious was that there was enough approach track; that it did not come right out of Dalton, off to the left, and into the siding. We could have rearranged other trackwork but at this point, after nearly nine years of construction and re-construction, this was to be the LAST track adjustment. Hence this being the 2nd criteria - no other track gets redone!

In this next shot, loose track is being laid out to get the feel for how to install the siding. I rarely use measurement tools, math or other metrics to size up this work. I like the hands-on approach. This could answer a whole lotta questions about other work of mine!

Choosing the turnouts
I inquired extensively about using a curved turnout. Most everyone advised against it, especially if using a stub because of the potential derailments. This being a period layout however, stubs were a must. Working with Hobby Masters train's manager Steve, we perused the Walther's catalog. The coolest find was that Shinohara makes a CURVABLE, turnout; not curved but curvable. I went with this if nothing else to see how it might work. It is simply a straight turnout built as flex track. The beauty of this is that you can line it up so it fits according to the radius already in play. It required loosening the approach track and some maneuvering to line it up. For straight turnouts I simply lay a straight edge along the approach to the turnout. On the curve it is all eyeballing.
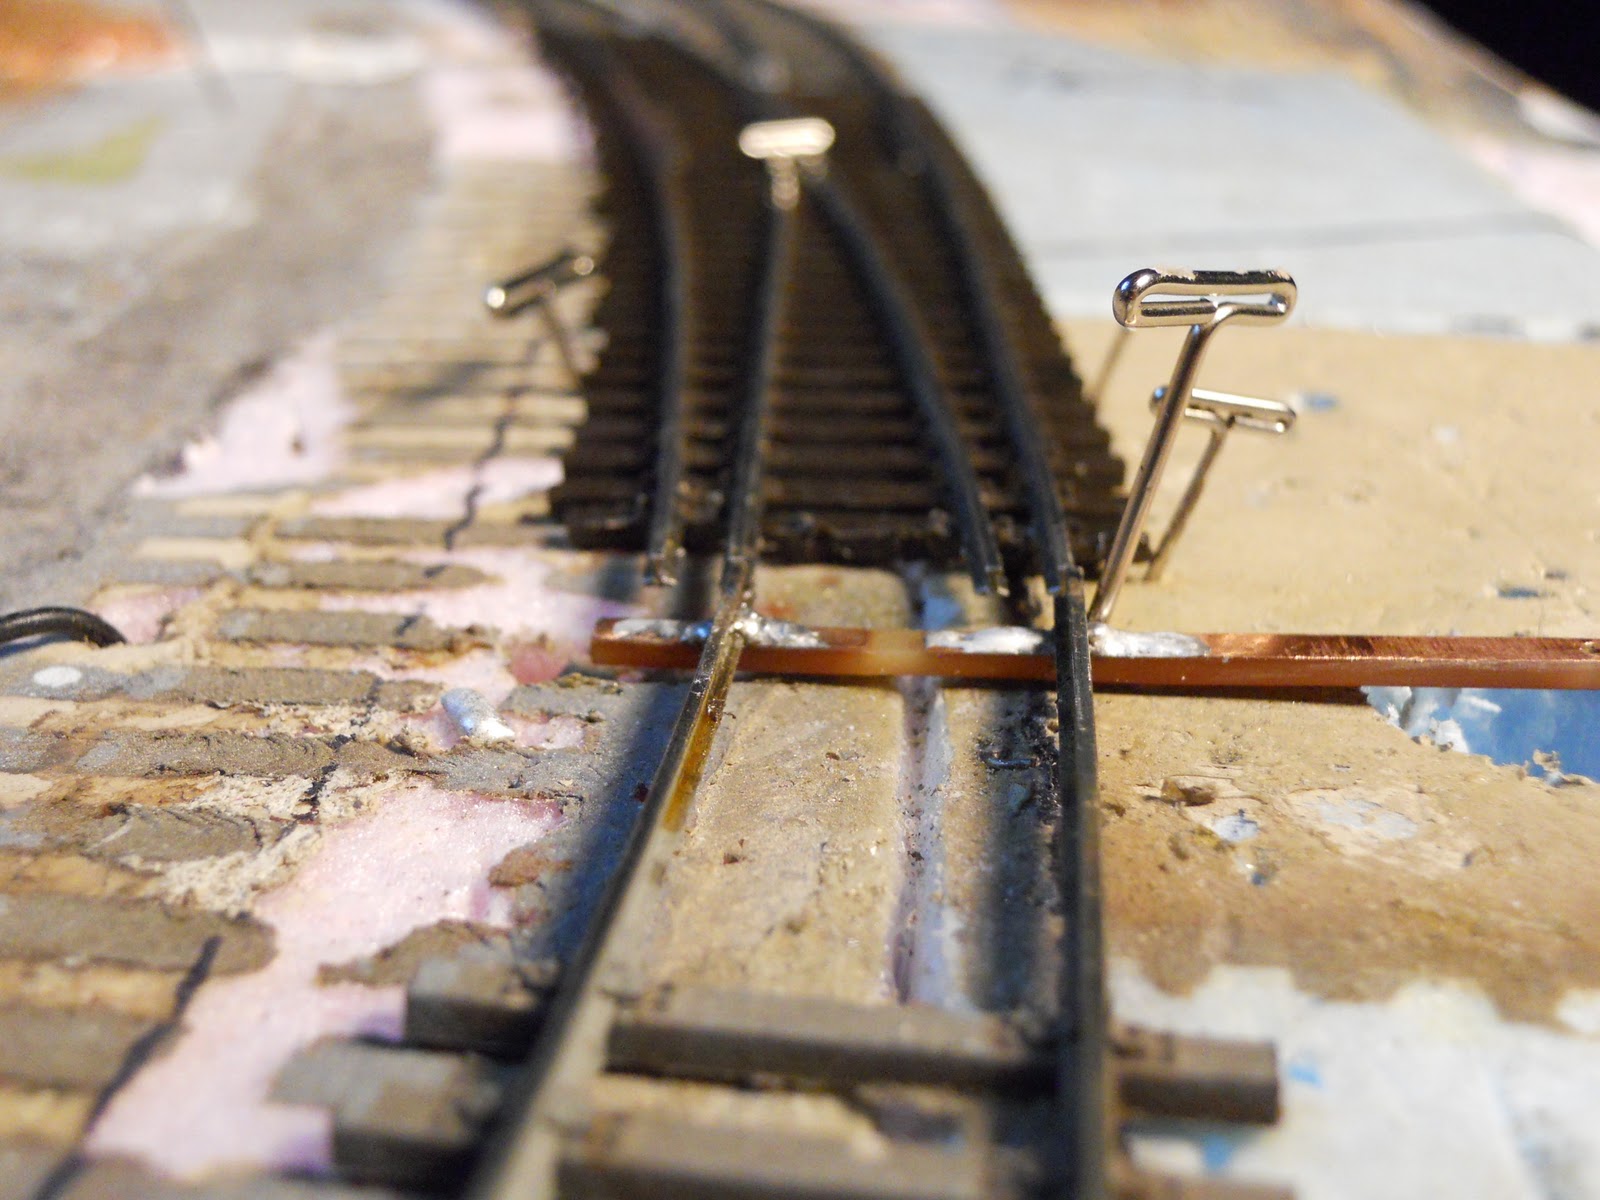
These two photos below show the curvable turnout before and after bending the rail. The head block has been attached to the approach rails to hold the gauge and is ready for linking to a Tortoise. Again, the bending was strictly continuous adjusting and eying up the cleanest transition possible between the approach, or fly rails, and stubs.

Here you can view the other end of the siding, the north approach, which happened to be nearly straight ;-) going into the siding.

After cutting the inside ends of the ties just above the frog I was able to bend the straight rails about 3-4 degrees, just enough for a clean joining of the rails into the siding. I applied the same technique using Homesote for a base as described in my section entitled Stub Switches. The length of the siding was determined partially by the length of train I wanted the siding to hold, but mostly by what I could safely fit while keeping a reasonable distance between it and another stop or station.
Once the track is in its final position, a light coating of PL300 is smeared onto the insulation foam to secure the track, then weighted. The fly rails were adjusted for a cleaner entry to the stubs; here they are still too straight.

Stay tuned, even though it'll be another month or so (how about New Year's) before the next posting, hopefully you'll see the addition of the cut as well as the towns of Kingston, Dalton and Chattanooga coming to life as well as the completion of the Howe Truss scene.

