Showing posts with label Resources. Show all posts

Saturday, January 14, 2017

Organizing Tips 1 - Styrene Sheets

I cannot emphasize the pleasure of having my 'stuff' situated for ease of access. I, as perhaps many of you, have acquired many different styles and diverse sheets of styrene. In the earlier days I was experimenting scratch building everything from structures to rolling stock. I had used both wood and styrene to find what I prefer given the different advantages and challenges of each. Researching the different master modelers' ideas, often recommended was to have on hand a wide variety of materials to avoid time lost either traveling to the hobby shop or waiting for the mail from on-line purchases. Inevitably I would need something that I did not have on hand. My conundrum was how to organize the packages which were in a box and required a constant rifling through to find what I needed. Here is one solution that you may find useful. This is a left over large 3-ring binder from training materials for my work. Staples provided the plastic inserts and wallah! I had my organizer!
 
Seeing this as a viable way to hold and organize, also filed were all the various paper products from Miniature Plant. I was going to add their link here, however, it appears that they no longer exist as their name is up for sale! This is one most important reason that if you find something you like, PURCHASE EXTRAS! This company was fabulous because you could purchase a sheet, download the PDF and print as many sheets as needed.
However, the general idea of using a binder is something to consider as you look to become organized. Hope you find this helpful.

Organizing Tips 2 - Building Sheets and Scale Lumber

If you follow my blog you know that the majority of buildings are scratch built. This requires a variety of styrene as well as scale lumber materials. At the very least, if not organized, looking for what I or my crew need is cumbersome and an inefficient use of time. At worst it is very frustrating combing through boxes or piles of packages. Keeping building materials organized is key to expedite ease and efficiency. I had a common situation, as many model railroaders, limited storage and wall space, especially since the ceiling is cathedral-like and at an angle. Here is one idea I came up with to separate the building materials. It is a file box with eight sections, four on both sides.
On the left half or section of this filer I have inserted both styrene and paper walls, roof and flooring materials. They are organized in large zip locks.
As you can see, each zip lock is labeled. Others include Shingles and Roofing. This makes the 'search' effortless. On the right side or section I insert the variety of Northeastern, Midwest Scale Lumber and Evergreen Styrene Strip material. 
Above these packages of scale lumber and styrene strips I filed thick styrene sheets. The file box is thick plastic and easily attached to the wall. These can be purchased from Staples or other office supply houses.

Saturday, September 24, 2016

CATOOSA - Mantua Rebuild

I have embarked on the next addition to the W&A stable of locomotives, the Catoosa. She was a Norris built locomotive, same manufacturer as the Yonah. As always, a key reference for the Mantua General alterations is Al Mueller's manual...
One of the more prominent elements to his rebuild is his  idea on making room in the tender for a new motor, decoder, speaker and capacitor. Once the tender top is removed, grinding away some of the frame is needed to accommodate these parts. And since the original model comes with a plastic wood load, that is not acceptable for a fine scale model replication. Here's a page from Al's manual on preparing the form for the wood load. 
Now here's the result of my attempt to replicate his instruction. You can see that I added a brass plate and water tank cap; the cap is from Precision Scale.
These next two photos show the tender interior exposed. By being able to remove the wood load there is easier access to the motor section without needing to remove the entire tender. It also allows for more ventilation. The black tip coming out of the tender front is a drive shaft cup from NWSL. The drive shaft mechanism is another redesign element also offered in Al's manual.

I use a motor from a fella named "Motorman" who restores and rebuilds a wide variety of motors and can be found on the internet. He operates via eBay usually. This motor is a Swiss Maxon 13 mm 7 pole coreless motor-High torque (150731330992). They run about $45. My locos are able to pull 12-18 car trains which is quite a feat given that the Mantua General's are not known for their pulling power. Of course I weigh my cars below the NMRA standard to about 30 grams. 
The decoder is a Tsunami Micro. But these have been discontinued. Their replacement decoder is called Econami. Al has installed one or two and vouches for their reliability and easier programming as well as installation; these are slightly smaller believe it or not.

Friday, March 4, 2016

STRUCTURES & SIGNS

With much of the layout completed, I am now focusing more on structure colors and sign designs. As many of you probably know, color is one of the most challenging, and sometimes perplexing, elements to recreate. In addition to cruising model railroad blogs and sites, one source for ideas has been "The Civil War In Color". Here is one taken on PA Avenue during the Grand Army review at the  end of the war.
This one below is a store near Ford's Theater. There are several very cool details to consider. One is adding small signs as on the columns. Another is adding a larger sign such as the one saying "Family Circle". Then there are the drapes and the green balcony railing,  One other consideration is attaching a gas lamp as shown below. Another element is the fogged window panes. Makes it easy to avoid detailing an interior!

Although one could challenge the accuracy of either or any, such is the case in most colorized or even suggested colors in any period photo. However, these provide enough plausibility to copy for my purposes. I also read that most structures of this type had three colors, making for some fun combinations.

My town of Dalton now has my attention as there are several buildings that have been waiting for an identity! Below are two buildings that have made the transition.
For the Cherokee Insurance Banking Co. I decided on these darker colors since this is a formal business structure. To construct the sign, I first  measured the space dimensions on the building. I then perused many font options that I had seen in other photos and came up with Algerian. It took a few tries to get the font size to a correct height. After a few test fits the sign was printed on my computer using typical copy paper. It was then cut to size measured earlier. Next was to cut a piece of Evergreen styrene for the backing. I chose .010. I then framed it with .040x.040 strips which provided a frame for the actual sign. The next to-do's are window treatments, and then the next challenge - what to do for the show windows on the ground floor! One idea is to find a color photo that could give the illusion of an interior that is simply pasted or glued onto the inner side of the window. Another option of course is to add an interior with a light. Hmmm?
Photo below is a paper flat that DC Cebula expanded upon adding a chimney on the right. He then built a slight addition to give it a 3D perspective. One most attractive additions is his detailing of the roof trim. The sign was made in a similar fashion to the Cherokee Insurance Co above. 
Both signs are black lettering on white paper. The frames were painted black with craft paint. I weathered both with Doc O'Brien's powders. For this one I used brown and yellow.

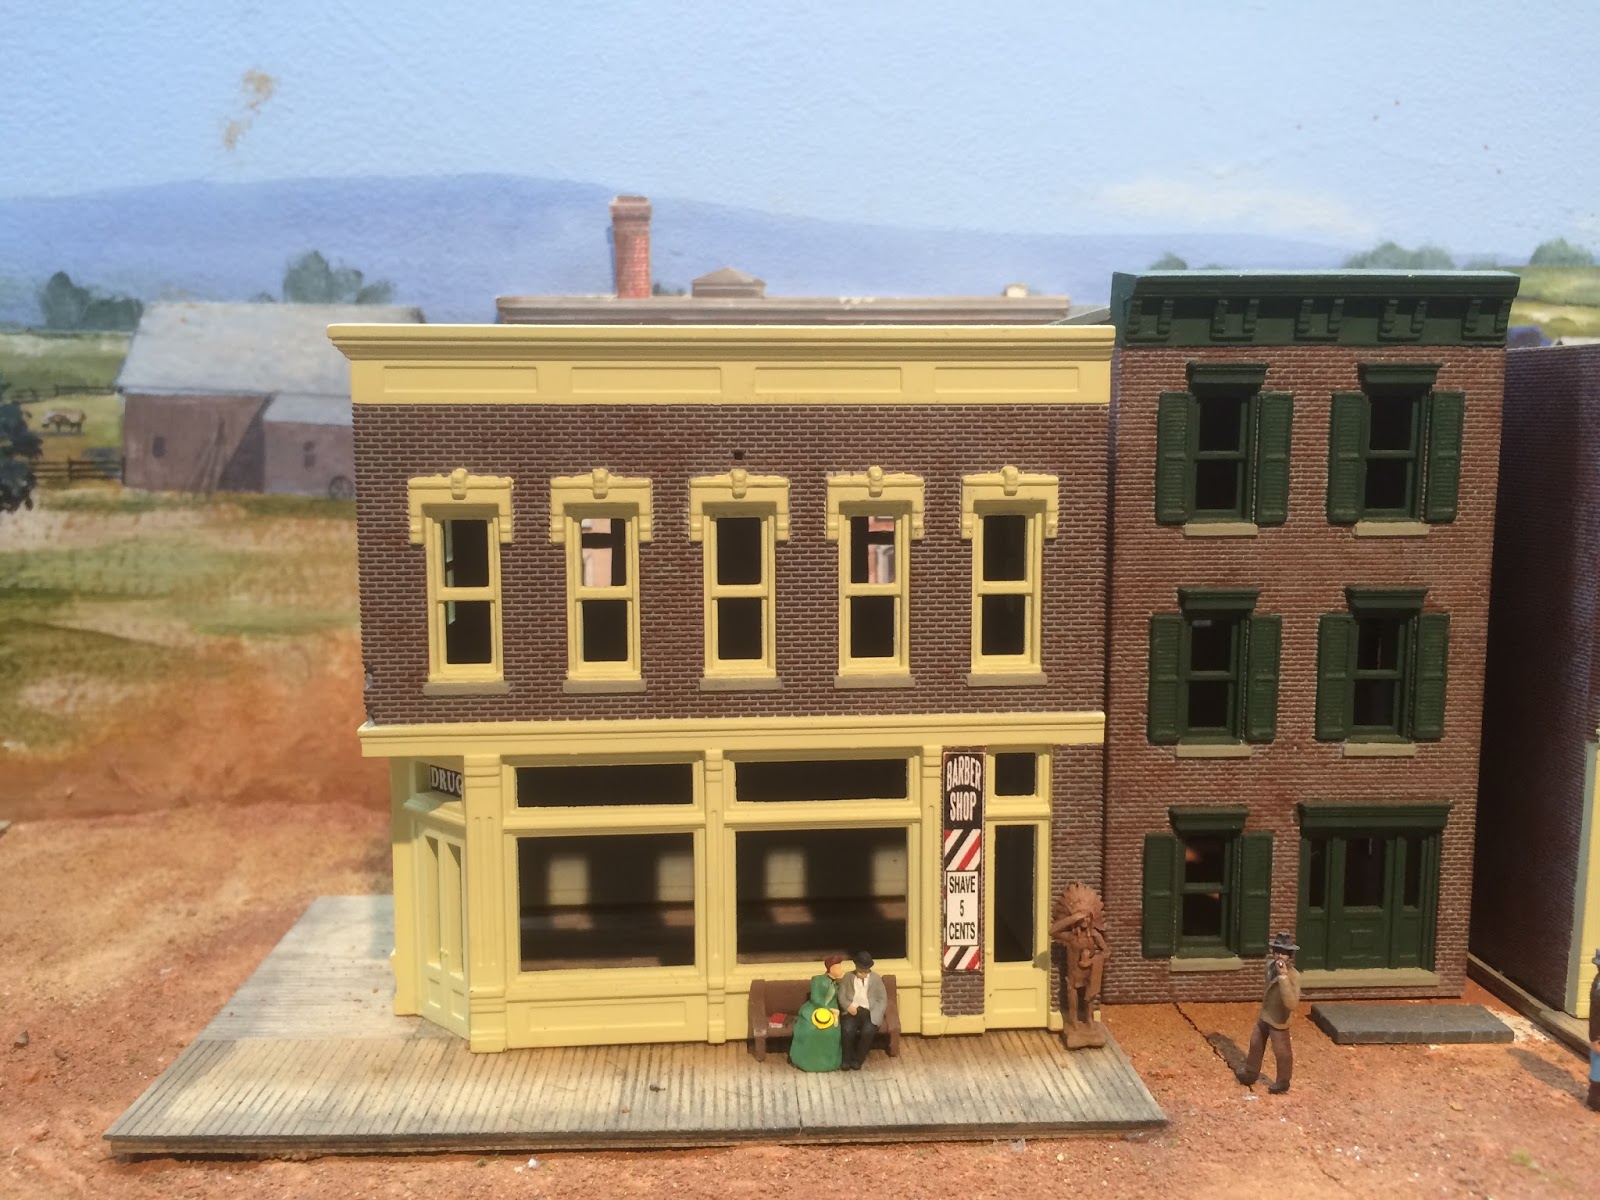
Next in line is this Drug Store and barber Shop. I am considering a third color but not sure which. Of course these windows need their treatments and some semblance of an interior. The building to the right is a residence of one of the town doctors. We will add a small front yard and fence, perhaps a flower bed. 
Another source for signs is the movie 'Horse Soldiers'. In particular are the scenes at Newton Station. There are at least a dozen signs shown. Some are painted directly onto the building. Others are on a framed placard and there's one or two hanging. You'll see a few store windows painted with such titles as BAR. I'd guess that there is also eight or so different fonts. I am currently surfing the web to find font sources. However those that come with Windows have provided a decent variety for now. In addition to the Algerian I also use GungsuhChe, Bell MT, Baskerville Old and High Tower Text. 
You can look for other font types on our civil war railroads yahoo site by John Ott. 
Lastly, I have been having TOO much fun making signs now that I have found a few more ideas for working with decals. This brings me to sharing with you a fabulous HOW TO book by Kalmbach by two of the best and well known model railroaders, Dave Frary and Bob Hayden. I Most enthusiastically post the cover here:

Saturday, September 19, 2015

'Resources for Old-Time HO Modelers'

We are a small niche in the world of model railroading. And when I find a person, site, group or blog that is also interested in, if not devoted to, period/Old Time railroading I do what I can to promote their existence. Hopefully this translates into greater visibility and at best connections and trade craft sharing as well as product purchases.

Here is one such site by John Ott. I have not had the pleasure to meet John, yet, but noticed he or someone from his site visited my W&A blog. I usually check out those who are checking out us and found John's site to be quite uplifting in that he does promote manufacturers, vendors and fellow modelers. Listed are everything from figures to kits; some of whom many of us know such as BTS and Bernie Kempinski's USMRR. 

I encourage you to visit his site, http://www.ottgallery.com/FavoriteLinks.html which is also listed with other notable sites and clubs on the right side of our blog page.