Long time its been! I've had a few questions about Chattanooga Car Shed dimensions, contacting me and Musket Miniatures. My email address is thomradice@gmail.com. I'll be sure to follow up if you wish to post your questions there.
I started hosting operating sessions last winter/spring. A large realization was the narrow passage at the head of the peninsula. This past May I decided to open it by making a cut between the south side of Kennesaw and the Confederate Redoubt. The two following photos show DC installing the new section and its completion.
The outlet was repositioned in the corner. Adding the new section now allowed for a new siding and the aspiration to add the Schofield Rolling Mill. The remains are in the photo below. General Hood, abandoning Atlanta, was forced to destroy his ammunition and supply trains here which caused the destruction of the mill.
A significant feature of this industry is that it was built along a rail line. Most industries were not. My space allows for one track. I'll TAKE IT!
Next step was to layout a couple of turnout templates. The layout being set in 1863, installing stub switches was a given; but I had not done curved let alone a 3-way, the latter allowing for greater operational possibilities. Here are two shots, one of the curved templates then the 3-way. Ties were preset for the 3-way by my friend Ray Russel who has been a valued contributor. On blog home page, got to Labels, scroll to Videos. The first one should be "Atlanta Shift", a time lapse by Andy Salcius of the adjustment where Ray is cutting the layout and about 12 club members are moving the 14' section that expanded the aisle.
You'll notice sections of Homasote inlaid. This is to both hold the spikes as well as ensuring a level deck.
Once the 3-way was installed I realized I had inadequately planned for the Rolling Mill! It blocked accessibility to the entire 3-way. Hence, the turnout needed to be removed and relocated!
A key step however, prior to spiking the rails, is to solder the "headblock", the long tie, to the "fly rails" , the two rails that were operated by the switch stand. The headblock will be attached to a throw bar connected to the Tortoise switch machine. It also keeps the rails in gauge.
Photo below, the Homasote is laid-in and rails are still attached to their metal sprue which is soldered. Next pic is a close up. These turnouts are from BK Enterprises, the only source I know.
These next two photos show the ties being positioned for one of the curved turnouts, then the rails being positioned.

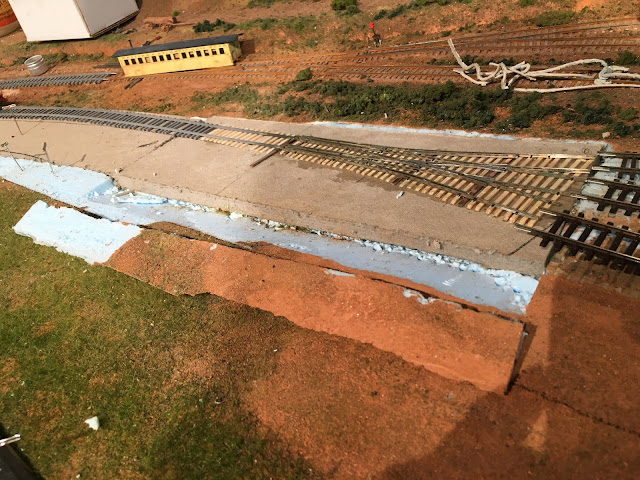
Next was to uninstall the 3-way. I spent some time thinking about the easiest approach as did NOT want rip out the rails, etc. and re-spike the entire configuration. As the Homasote was glued into the pink insulation foam, I considered cutting away a section of the insulation foam the length of the Homasote to undermine it.
The section out, the caulk I used fortunately was ease to pry loose!
The open space was relatively easy to refill with other insulation foam.
Here is the placement of the rolling mill footprint. As progress continue I'll be posting more photos and text.


No comments:
Post a Comment