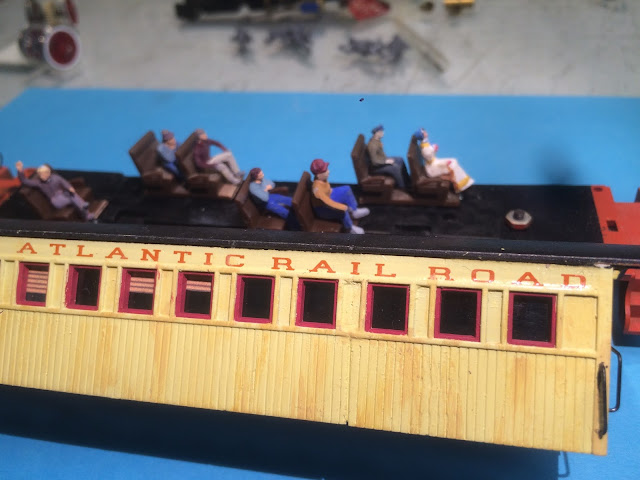
This post is a follow up from the previous by taking the 'Passenger Car Detailing' to its next step. The ease of this process is that unless the car is lit, passengers only require the slightest of color. The original cars come with a card showing silhouettes of passengers. I prefer creating a 3D quality to enhance the models... and, I just may install lights in the cars down the line.
At first I thought I would need to have figures be of the period. However, after a test using 20th century folk I could not tell the difference. This contributes to the 'ease factor'. I have many Prieser figures left over for other kits where a few choice positions were transformed into period-looking people. All those leftover seated figures are now being conscripted for the cars!
I prime them while on the sprue. I then use the Pic-n-Stick Q-tip looking tool to hold as I paint them if not on a sprue. These are fabulous. One box has about 30 and they can be reused many times.
As you see in this photo below, there are 3-4 basic colors. No detail painting as mentioned since most of the view will be silhouette-ish.
Next is to attach the passengers to their seats. These 'Pikestuff' seats can be found at train shows, as well as seated passengers, versus buying retail. I find most hobbyists have leftover seated people that they want to unload.
You'll notice below I have the benches spaced because I don't want to waste seats and I want to position them randomly. The piece of styrene under the seat base is so the bench is even with the weight that runs through the car center and keeps the bench level. By the way, the lady in front came painted. Another find at a show.
This is a larger section to cover three windows.
And the final step is to enclose the passengers, then send them off to their next adventure... as am I!
At first I thought I would need to have figures be of the period. However, after a test using 20th century folk I could not tell the difference. This contributes to the 'ease factor'. I have many Prieser figures left over for other kits where a few choice positions were transformed into period-looking people. All those leftover seated figures are now being conscripted for the cars!
I prime them while on the sprue. I then use the Pic-n-Stick Q-tip looking tool to hold as I paint them if not on a sprue. These are fabulous. One box has about 30 and they can be reused many times.
As you see in this photo below, there are 3-4 basic colors. No detail painting as mentioned since most of the view will be silhouette-ish.
Next is to attach the passengers to their seats. These 'Pikestuff' seats can be found at train shows, as well as seated passengers, versus buying retail. I find most hobbyists have leftover seated people that they want to unload.
You'll notice below I have the benches spaced because I don't want to waste seats and I want to position them randomly. The piece of styrene under the seat base is so the bench is even with the weight that runs through the car center and keeps the bench level. By the way, the lady in front came painted. Another find at a show.
Next is to add louvers. As I mentioned in the prior post, my friend Brian Kammerrer, who also painted the backdrops, sent me this sheet based on my description.
I cut various lengths and install with Aileen's Tacky Glue.This is a larger section to cover three windows.
And the final step is to enclose the passengers, then send them off to their next adventure... as am I!


