Wednesday, May 7, 2014

Atlanta Concert Hall Phase 1

SCRATCH BUILT
The Concert Hall is/was one of those iconic buildings in Atlanta made famous by photographer George Barnard who accompanied General "Cump" Sherman on his campaign along the W&A in 1864. The Concert Hall was on the corner of Whitehall and Peachtree streets. This view is looking east with a reasonable view of the south wall. It clearly presented a scratch building challenge. I chose to build it to scale primarily because it has a huge space to fill on the layout. The second floor windows scaled out to 10' tall.  Required then are scale windows which, as far as I could locate, no manufacturer makes windows of this size that would be appropriate for this building. Another provocative construction element are the indented upper walls. 
My intent is show you some of my approaches to solving these and other thought provokers.  

First step is always a mock up. My friend and fellow Garden State Central Model RR Club member Jim Judge photo shopped the hall to HO scale. He then sent me the file which I printed and then mounted onto Foamcore.
You can see the immense size of the third floor windows in particular, 10' high as previously mentioned
 WINDOWS - Inside walls
Two different materials were chosen for the walls, Evergreen styrene .010 for the windowed walls, and Foamcore. My greatest challenge was constructing the window mullions. I had several AAAAHH! hair pulling moments trying to line up the narrow styrene strips. As you will see, the mullions are still not lined up after hours of making lines along the inside walls.
Another view showing how PVC was used to shape the unique rounded corner of the building. The compromise for me was choosing sheet styrene thin enough to bend the corner yet strong enough to hold its form. However it was clear I needed to add bracing as shown below.

 WINDOWS - Outside walls
Below is the nearly finished west wall. Each window was framed along the vertical sides with Plastruct angle beams to cover the corners. The lintels and sills are Evergreen strips. These are glued directly onto the brick wall face which is a paper material from the no longer operational Paper Creek company. However, Micro-Mark makes a terrific adhesive paper product that I and LeBron have used very successfully. I also found a paper product by Miniature Planet offering a variety of brick and stone products as well as roofing and miscellaneous structure materials. These paper products are quite good and certainly save enormous time, especially on background structures.

Below a closer-up view and after the primer was applied to the windows. You can see how the mullions have bends and are not perfectly straight. My Achilles heal is sometimes impatience although I was SO certain they were aligned when glue was applied. Good thing the Hall is in the rear of the layout!
The upper indentations are sections of the styrene wall cut out and slightly larger styrene pieces cut to overlap the openings by 1/8", then covered with brick material and glued to the inner walls. The photo below this one illustrates the end result...
You can see below, in the upper portion of the wall, the cutout styrene rectangles placed over the wall openings. Also note the wall reinforcing beams. These were added after I realized a wall this large would flex without them. This structure was a build-as-you-go; one reason why it has taken nearly two years! It sat a LONG time; one year as the mock up, nearly two years in partial construction. I had no idea how to move forward; a great re-learning on patience and when to leave it alone.


Left, clamping an interior brace in prep for the upper outer wall detailing. Right, a view showing the openings in the upper wall that were closed with brick covered styrene sections that provided the relief look.


Coming together, the blue masking tape is used to prevent paint, the gray primer, from getting on the brick wall, making the job quicker. In particular, this tape has less adhesive than standard masking tape and peals away without tearing. Of course pre-painting would have been the wiser move.

Next is to add external details. One being the stairway shown below. I wanted to be able to build this stairway structure so it could be removed causing nominal damage to the brick. So drilled holes 3 holes into the platform structure, glued small brads to the stairway with points facing the wall, then drilled corresponding holes into the wall. I did the same with the stairs using two brads. Now the entire stairway is removable making detailing and painting much easier. Finally a more "thoughtful" move.
The open are to the left of the hall is an alleyway / road that Christopher suggested as converting to an access to the building. This was a concert hall. His rationale was an entrance for musicians, actors and props. I built two. One entrance on the lower level for actors and musicians, the upper platform for props that may have needed to be hauled to the upper level for ease of transport to the stage. All  so made up of course as I have not found any descriptions. Assuming there were, they were most likely destroyed when the fires consumed much of the city.
80% completed as in detailed, painted and landscaped, remaining is the addition of trees which grew between the hall and tracks, painting the sidewalks, blending the backdrop with the background street and adding a dozen or so Atlantians.  

Following three photos show the completed hall. Although not discernible. Just below the roof top brick work is a thin line of what is know in the masonry trade as "dentals". These are bricks that have been placed in an alternate pattern of gaps between each brick as an ornamental design. 


One other modification was the front 3-story stairway. This may need to be altered as the stairway may have only gone to the 2nd floor. But for now its livable! The last addition will be a poetic license of sort, adding a beam and pulley system above upper alleyway door. The idea is to imagine stage props needing to be hauled to the stage level that otherwise would not be possible up the inside stairways. Now we are ready for the May 17 NMRA NE Region Division meet... at least this building. 

Sunday, April 6, 2014

Blockhouse

Blockhouses were primarily Union fortifications constructed along the various rail lines as a prevention against Confederate raiders. The few photos that I have found show a blockhouse along the N&C line, Nashville Chattanooga. There is no evidence I've come across that suggest Confederates built any blockhouse type structures, at least not along the Western & Atlantic R.R. However this was another too interesting of a scenic element to pass up.
These photos show two different structures which were used as the templates by Christopher. He gathered real twigs, baked them to remove moisture then cut to fit the mock up. We chose the the are near the Howe Truss as a plausible site.
The following photos take you through Chris' general sequence of construction. The plan was a blockhouse. The scene was secondary and the intent was to 

capture the feel for the structure and its surroundings, not the specific
landscape.
Pink insulation foam was the base form. Twigs were cut,  trimmed and glued to the foam. He then planked the foam roof. Notice the foam was painted black first preventing pink showing between the planks and logs.


H


Friday, December 6, 2013

Lee & Gordons Mills

Modeling Project by Christopher Eldridge

Lee & Gordon's Mills is one of the more known photographs by George Bernard who accompanied Sherman during the Atlanta Campaign. Located on Chickamauga Creek, the Union Army occupied this area just prior to and during the battle named for the Creek. Interestingly enough it is a Cherokee name supposedly meaning "River of Death". 
This being a famous structure of the area there were several photos taken, below are two. The clarity and variety of photos and its position along the creek made it an easy choice to include on the layout.


Constructing the Mill
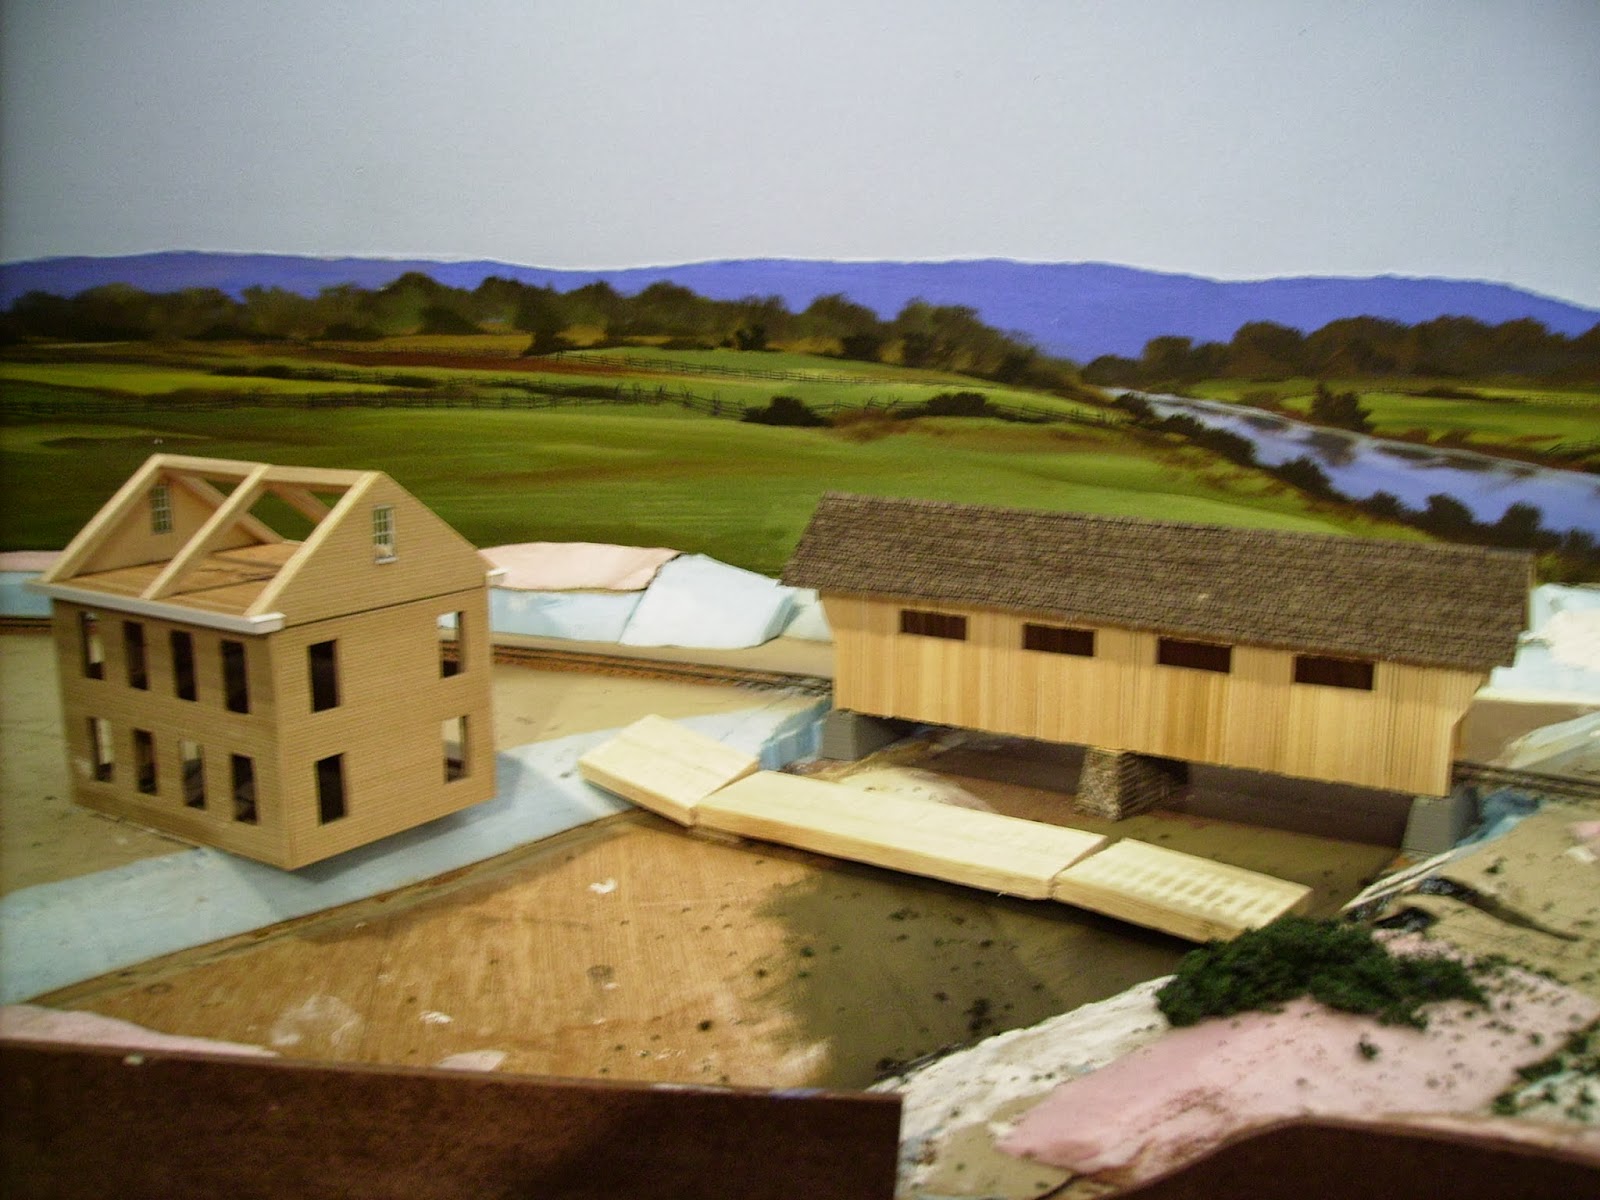
Midway through construction in this photo, Christopher used Northeastern siding for the walls and being a master carpenter was very precise on measurements and, more so, the accuracy of the model. He began in October 2011.
Chickamauga Creek has an east and west branch which converge into a main branch into the TN River. This main branch is simply known as North Chickamauga Creek. The mill resided on the west branch. Notably, the W&A traversed this creek approximately 12-13 times between Atlanta and Chattanooga. There is mention that covered bridges were common and although there was no such bridge near this mill, selective compression begs for the inclusion of one, hence, reasonable plausibility.
The balsa sections are the initial ideation for a wagon bridge that was actually there and nearly destroyed by Union cavalry. This crossing was a key ingredient for Gen'l Bragg and his Army of TN as they were attempting to close in for a battle with Army of the Cumberland. Here is the initial positioning of the Mill as the creek base is needing to be prepped for a pouring of Envirotex.

            Nearly a competed scene, landscaping and some structural details are to be added...
 
         A master at his best, true to form, he celebrates his progress and contribution. Nice slippers!


Tuesday, December 3, 2013

Chattanooga Progress, posted Dec 10, 2014

Here are the latest photos of progress in Chattanooga. Our last posting of this section showed only a few mock ups and maps.
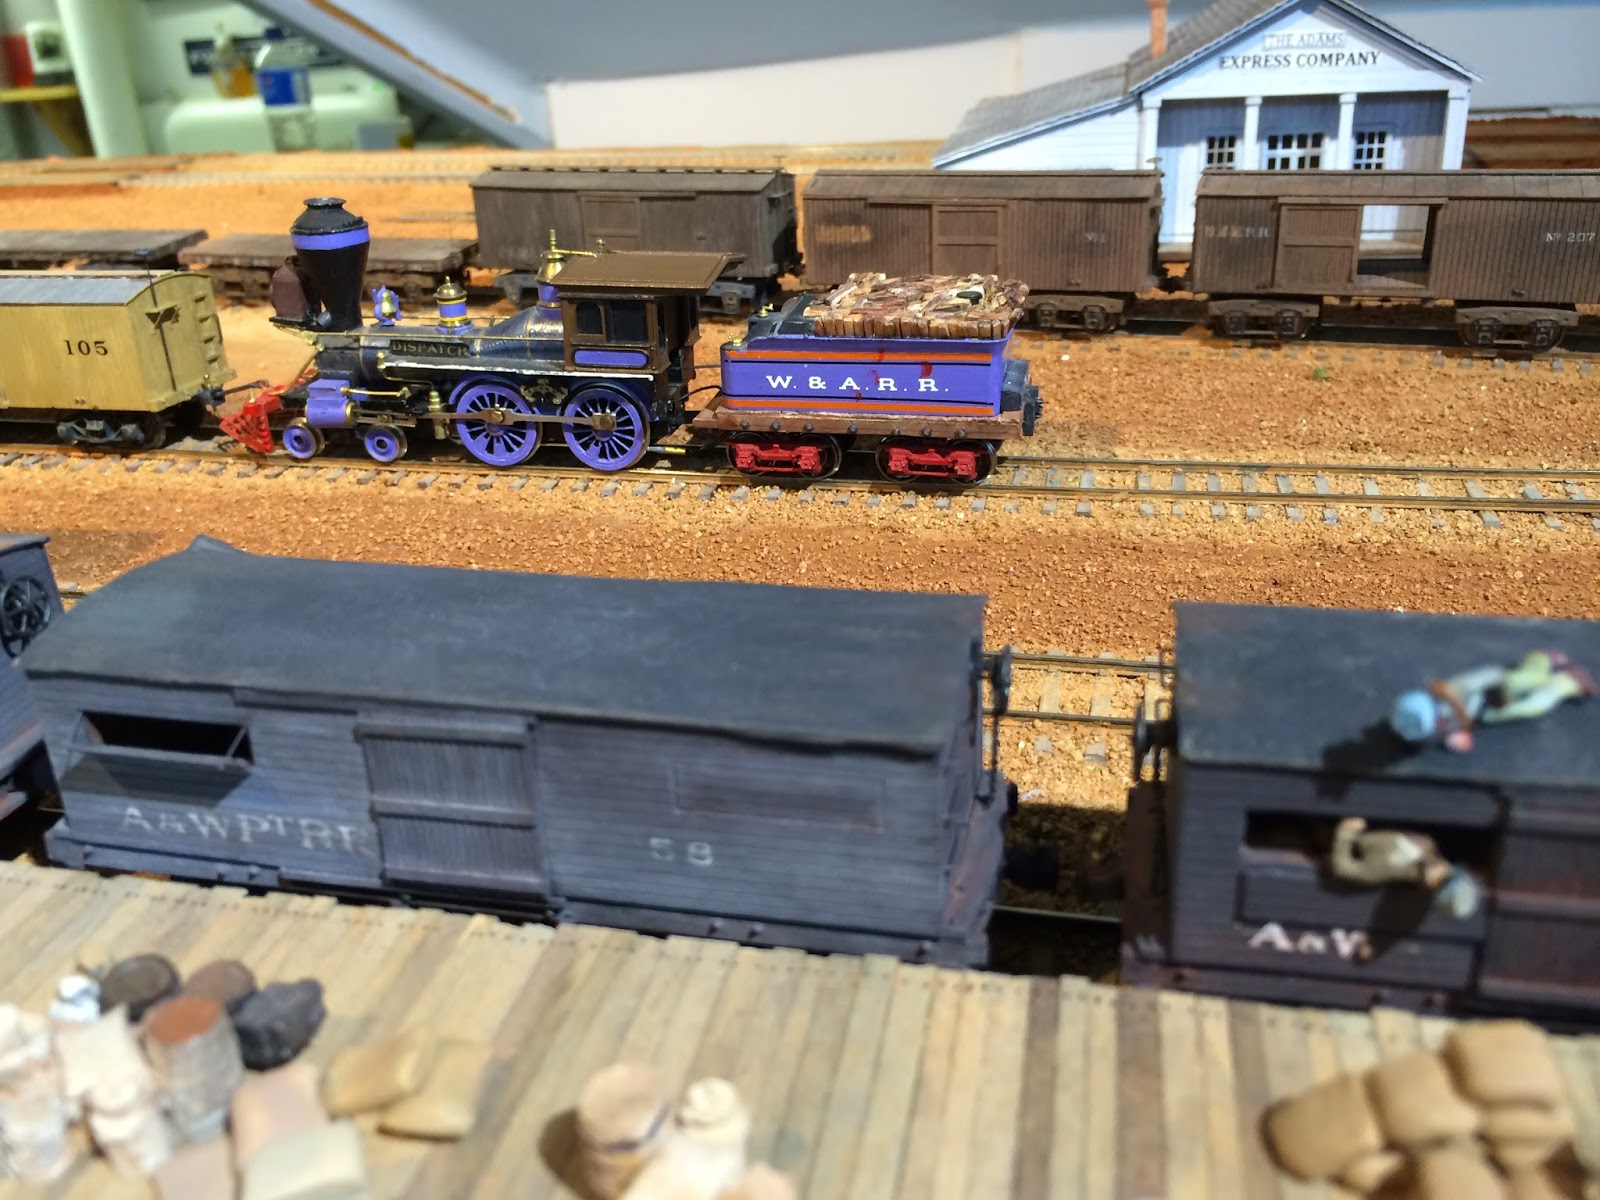
Below you see the addition of the Adams Express CO. and the Crutchfield House, the nearby hotel to the car shed, shown here as the white mock up in the background. 
DC added the platform. Although the platform is not shown in any diagrams that we've researched, nor is such a structure mentioned in any reading, for the purpose of a model railroad we included it for operations.
This photo is looking south, opposite from the above shot. We are 90% complete on this section. Other details and perhaps another commercial structure could be added in the open space at left.
Chattanooga was a terminus for the W&A and Nashville and Chattanooga lines. Later the East Tennessee and Georgia RR was added. The Memphis and Charleston passed through Chattanooga. Given that all these lines came into Chattanooga there are many possibilities for model railroading operations. 
The yard was filled with cars from different lines for the sake of the photo. These other rail lines are the Atlanta and West Point, Macon and Western and Georgia RR, all of which came into Atlanta.
These last two photos below show the scratch built Adams Express Co. and Crutchfield House, built by Chris Comport.


Consolidated

As with most model railroads a key element is selective compression. Here is a map, from our late contributor Zoe who was constructing a virtual W&A of the period, showing the rails into Chattanooga. There are two distinct features. One is the 2 tracks entering what is known as the Car Shed or passenger station. The other is the Wye track formation used to reverse locomotives. There was also a turntable in Chattanooga which appears in the next illustration below.


This drawing below showing the turntable is from a book entitled The Union Railyards Site, Industrial Archeology in Chattanooga, Tennessee by R.B. Council and Nicholas Honercamp. It was attached to the center track between the Car Shed and the other rectangular structure, the W&A Freight Depot, to its right. According to the authors, this is "The Federal plan of Chattanooga, 1863" and was from F.W. Dorr's 'Chattanooga and Its Approaches,' drawn after the battle of Chattanooga in November 1863. I chose to include the turntable, not the Wye since my space was too limiting.
Right and center is a notation, Battery Hazen, and was also know as Stone Fort. We have a tentative plan to include a portion of this fort at the layout edge.
Below is a photo taken from the area in the foreground known as the Stone Fort. So far there are no other details about this feature making it a creative endeavor for the layout. There is also mention of a Judge Hooke's residence in this view. Although barely visible, it was located in the grove of trees in the left background. This structure is being scratch built by D. C. Cebula. 

There are many interesting buildings to be considered. I chose prominent ones including a hotel known as the Crutchfield House, the Adams Express building and the home owned by Judge Hooke. Here is D.C.'s version as an HO structure, emphatically informing me that "...the chimneys are going right there!", as we debated the location given the photo. You decide and let him know... PLEASE.

These two photos of Hooke's residence were taken post war an deduced that the enclosed balcony was post war as well. As D.C. has completed the basic structure, next are the detailed elements and landscaping. One anecdote is that when Chattanooga residents were evacuating, the Judge was provided with his own house car to remove his personal belongings.


For the Car Shed I connected with Alkem Scale Models, http://www.alkemscalemodels.com (Bernie Kempinski) to laser cut and construct the building primarily for the exactitude given the numerous arches and trusses. 
Here is a period photo followed by Charlie Taylor's model. He is building the Memphis & Charleston R.R. in O scale. Here is a link to his site, jcharlestaylor.com/taylorSPECIALtrains.


The Crutchfield House in mock up...

This will be scratch built by Christopher who has also done the Lee and Gordon's Mill and the Barnsley Garden Mansion. Both are featured in previous blog posts and in our Labels section.
Here is a long view to compare with the 2 maps at top of page... Photo is taken from the Wye area and the Stone Fort site.

Adams Express is in the early stage of mock up. It was situated between the Shed and Crutchfield House. Here's about a 20x, zoom from a period picture:


Thursday, November 21, 2013

LeBron Mathews' Western & Atlantic R.R. South Branch

This W&A is sub-titled South Branch to distinguish his layout from my 'North Branch' as LeBron resides near Columbus GA. LeBron and I met though D.C. Cebula when D.C. posted an ad in a Model Railroader issue inviting modelers interested in ACW RR's to connect via internet. At that time D.C. had attracted about two dozen people. Shortly thereafter D.C. formed our current group the civil_war_rrs_@yahoogroups.com

LeBron and I had our first meeting in 2001 at the Georgia State Archives, both of us in the early stages of our respective layouts. Since then LeBron has just about completed not only his railroad, but has redone or renovated a variety of his modeling elements. Although built in a room about 8'x10', the detailing is truly extraordinary and very much a work of art. I have the pleasure to feature some photos of his best-in-class modeling., a master modeler indeed.  

This is his panorama of Atlanta and the skyline. His Backdrop was initially a commercial photo backdrop and runs along three walls. His layout is along three walls and is a walk-in. Trains run north or to the left. Atlanta is the end of the line. Over the years LeBron has used a variety of mediums including reduced photos pasted onto the backdrop and then painting additional details. He also has hand painted structures, fields and vegetation. An example is the church shown in the photo center.

If not all, a clear majority of LeBron's structures, most being scratch built or kit bashed, represent actual businesses and, or homes in 1862, the year he models. Middle foreground in the following two photos is the Trout House. No not a fishery or restaurant but one of Atlanta's premier hotels. Also notice the building to the right. It belongs to the Free Masons, their meeting hall.


Below is a George Bernard photo. He accompanied Gen'l Sherman and the Union army during 
Atlanta campaign. Compare this pic with the one above to see how LeBron built an exact replica of the Trout House as well as the building to the right belonging to the Free Masons.


Here is the famous Car Shed all scratch-built  of course. I believe he used primarily Evergreen styrene, Grandt Line details and the brick is a Micro-Mark paper product. LeBron has also added functioning gas sconce lamps for night operations on the inner structure which unfortunately is not visible here. Actually his layout is set up for night running. Many structures have internal lighting.

The dominant structure below is LeBron's depiction of the Concert Hall, one of the signature structures in Barnard's Atlanta photos. In the foreground are two trains, one arriving the other departing. Operationally, he has made gondola inserts and flat car loads, such as the artillery unit, for the quick on and off. 
Looking closely at his backdrop you can see his structure and field additions. The entire layout is full of details covering nearly every inch of benchwork. We'll be sure to add another post perhaps a video during an operation and views during one of W&A's summer evenings.

Saturday, November 9, 2013

Al Mueller's Orange & Alexandria R.R.

October 1 I visited Al Mueller at his home in WI, also the home of his HO scale Orange & Alexandria R.R., depicting 1861-62 Virginia. He plans to run both Union and Confederate operations and has the fleet of locos to do so, 10 to be specific and nearly all Mantua Generals that have been re-motored. Two of these are featured in a video posted a few days ago.
Al is fortunate to have a huge and nicely finished basement. In the background is a layout he built but depicting the 1950's. He has since seen the light and now models a most colorful era for locomotives. He has posted many photos of his locos on our yahoo sight Civil_War_RRs@yahoogroups.com
Al has been extremely helpful to a few of us as he wrote a manual for re-motoring the Mantua General. The two 4-4-0's in this photo however are of my W&A which I brought here for fine tuning by the master. Although seemingly basic, we were able to adjust everything from CV's in order to standardize speeds, learn differences between decoders as I use 2 different manufacturers, and some 'general' tips to increase performance. 

Al has set up the digital readout to the left on his fascia to show loco speeds. One of his talents is his engineering mind and patience, key skills especially for me as I continue to educate myself on the modeling nuances.
In his past he had a passion for rebuilding cars. Although slightly distinguishable, the black and white photo on his wall to the right of his cloud backdrop is him next to one of his autos. 
 
This is the Lincoln House by Laser Art Structures. The portico and columns were Al's addition. He is currently building a foundry with unbelievable detailing. Look forward to a posting once completed.

I had to show you the scope of his "workshop". Every tool a modeler would not mind having or at least access. Thanks Al!